Foto: https://flic.kr/p/9gkb8i Tuvimos muchos problemas en calcular los valores del color rojo, verde y azul. Pedimos ayuda a nuestros compañeros y nos explicaron, despues pudimos acabar el codigo. Al final nos arrojaba un problema en la terminal y creimos que algo estabamos haciendo mal, investigamos y nos dimos cuenta que el problmea no estaba en el … Seguir leyendo Final Project →![]()
We. Are. Done. Finally, our program works like a charm, after several days of research and hardwork, our project is capable of resizing an image and changing the color to black and white.
We kinda did it in two parts, the first one being the black and white, that you can check out here.
For the “second part”, we researched and found out how to resize the source image using math and arrays. These links were reaaaaaally useful:
http://stackoverflow.com/questions/27351737/c-how-to-shrink-an-image-using-a-pointer-array
http://stackoverflow.com/questions/299267/image-scaling-and-rotating-in-c-c
http://doc.gnu-darwin.org/ImageMagick/www/ImageMagickObject.html
http://www.cplusplus.com/forum/general/2615/
We kinda teamed up with Eduardo, we worked together, and mutually helped each other.
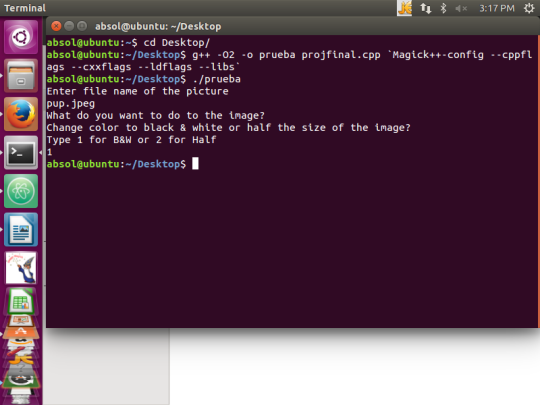
We had a lot of errors during the process about syntax but one we dealt with the most was an error called “segmentation fault”. After battling with it, we found out that our program wasn’t the problem, but the source image was. We looked and tried several images until we found one that worked, which was the golden retriever puppy on the English Wikipedia page of puppies. Eduardo told us that this picture didn’t have the same error and we confirmed that it didn’t.
We are really happy about the outcome of the project.
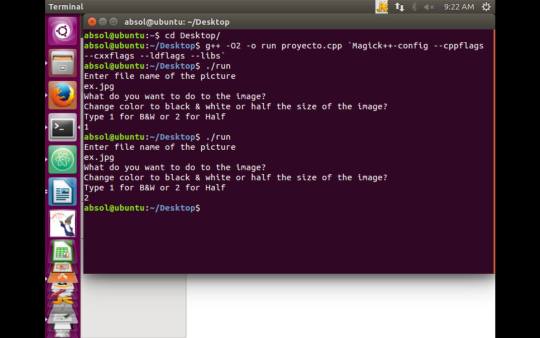
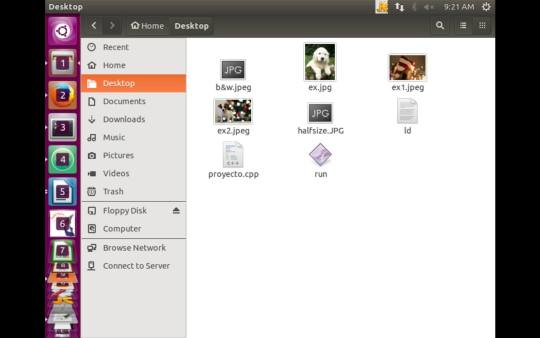
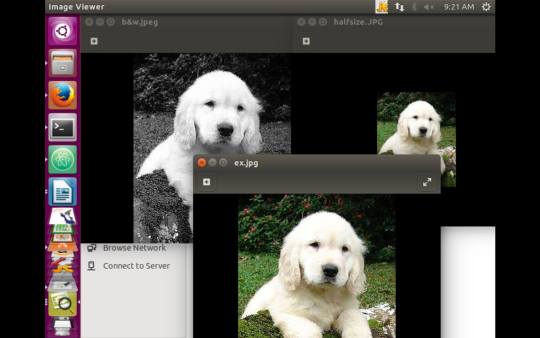
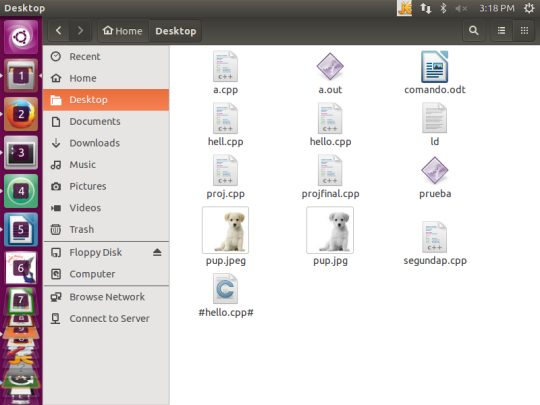
Here are some screenshots:
You can check out our final code here:
https://github.com/kenwbauer/TC101F15_Team06/blob/master/FINALPROJECT.cpp

FINAL PROJECT
So, we finally finished the project after some hours of hard work and problem solving. We teamed with Eduardo for debugging, because sometimes we had the same mistakes, for example, when trying with some picture, we got segmentation error and with others everything worked fine. After using a lot of examples, we discovered that it was because of the size of the image. In the last post, we were only missing the half the size part, even when it´s basically half the project, it was little for us because I think the hardest part was to make everything work in order to start the code. We research a lot about the coding, but our biggest problem was the first part. Our biggest problem with this last part was the segmentation error, we really panicked because we had the black and white part done, but when we tried with another picture, it just stopped working, but as I said before, we figured it out. SO, we are really happy to finish this. This was some of our help for this last part:
http://www.cplusplus.com/forum/general/2615/
http://stackoverflow.com/questions/27351737/c-how-to-shrink-an-image-using-a-pointer-array
http://stackoverflow.com/questions/299267/image-scaling-and-rotating-in-c-c
Here is our final code:
https://github.com/kenwbauer/TC101F15_Team06/blob/master/FINALPROJECT.cpp

So we finally got the project complete!!! After looking a lot of videos in YouTube and searching so hard on internet we found the way to convert the image into a scale so it could be smallest. After doing the “hard part” we search on internet how to convert an image into gray. All this […]![]()
We did it!!!!!!!!!!!!!!!!!!! We asked others teams that already finish the project, “How they fricking did it”. They help us out and teach us how to do it. One more project done. Team 22 Link to our code: https://github.com/kenwbauer/TC101F15_Team22/blob/master/FinishedProject![]()
In this week we downloaded the library from Image magick. We are having a lot of trouble understanding it. We asked Ken for some help. We did not advance much since we have a lot of projects from other classes.
Team 22
In this week we read the project task and what we needed to do. Decided which library we should use. We decided to use ImageMagick library. link to ImageMagick: http://www.imagemagick.org/script/index.php TEAM 22![]()
Project
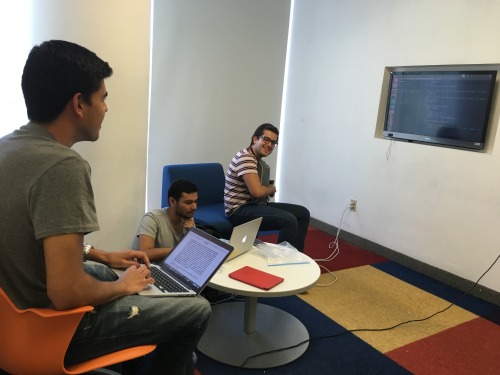
Sooo… we finally could have a big advance after the weekend when we couldn’t do a lot because the program didn’t compile for a fatal error. Ken fixed that and we work really hard yesterday. As you can see in the picture, we got together with some other classmates to find a solution to every problem we had (every team is in a different point). We are done with the black and white part, we are just missing the half-the-image part, but I think we have completed the most difficult part, that was to use linux correctly and research how to work with images. We used a lot of information from the internet, Omar saved the links, so, all of those are on his blog. Hopefully we will finish today the whole project.
Today Ale and I finally did some serious advance in the fina project. We did a lot of research and we were able to run one part of the project, modifying the image to black and white. Here are some of the webpages we used:
Basic command-lines:
http://www.imagemagick.org/script/command-line-tools.php
http://www.imagemagick.org/script/command-line-processing.php
Convert input image to b&w/grayscale:
http://www.imagemagick.org/script/color.php
http://www.imagemagick.org/script/color-management.php
http://stackoverflow.com/questions/13317753/convert-rgb-to-grayscale-in-imagemagick-command-line
And that’s pretty much it. We will try to finish the project by doing the “second part” about resizing the image tomorrow. In the meantime, you can check our code here.
P.S. Here is how it’s shown in Ubuntu:
The code for testing imagemagick finally worked 😀 !!!!!!!!!!!!!! I’m very happy, it’s a big step for Hector and I tomorrow we will finish all this!!!!! Here is the code that we use https://github.com/kenwbauer/TC101F15_Team19/blob/master/prueba The code only show a pixel… Continue Reading →![]()