Redes domésticas

--Originally published at Computer and Information Security

Es muy útil saber cómo modificar los ajustes de un módem. Cambiarle la contraseña a la red de la casa o incluso cambiarle el nombre puede llegar a ser muy sencillo y puede a llegar a incrementar un poco la seguridad de la red. Sin embargo, hay más opciones en los ajustes de un módem y éstas pueden llegar a ser implementadas de una manera muy sencilla. Una de las ventajas de acceder a los ajustes de éste es que puedes crear redes locales dentro de la casa o la oficia. La división de la red puede llegar a ser útil para conectar ciertos dispositivos a una de ellas y los otros a la otra, se puede crear una red para invitados, o incluso redes privadas para intentar mantener más segura cierta información que se comparte cuando alguien se encuentra en la misma red. A continuación, se mostrará un pequeño tutorial para crear una nueva red doméstica.

1 – Entrar a la página web del módem

Normalmente, para poder acceder a la configuración del router se tiene que ingresar a la dirección 192.168.X.X. En este caso para ingresar a la configuración del módem de Telmex, se ingresa a 192.168.1.254. El usuario puede variar (TELMEX en este caso) y la contraseña es la clave que viene en el modem.

1.png

2 – Ir a Red

Al entrar a la configuración del módem, una ventana parecida aparecerá en la pantalla. Hay que seleccionar la opción de “Red” que se encuentra en la columna izquierda.

2.png

3 – Inalámbrico (2.4GHz o 5GHz)

Una vez adentro de la opción de Red, se selecciona el tipo de red inalámbrica que se desea crear el la columna izquierda. En este caso, se seleccionará la red 5GHz.

3.png

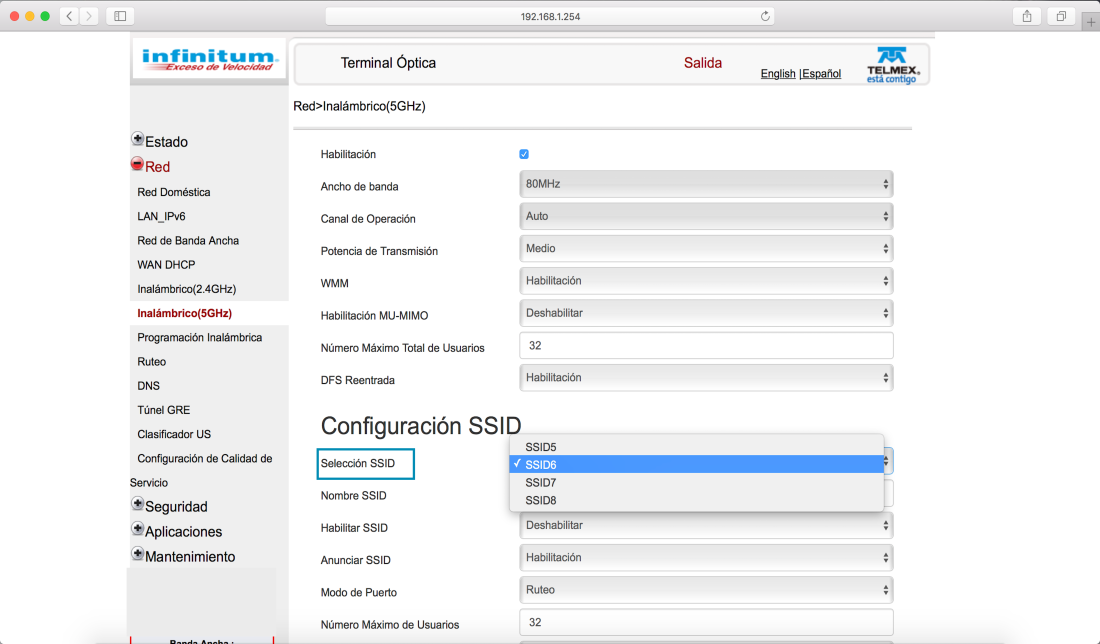
4 – Seleccionar SSID

En

4.png
5.png
6.png
Continue reading "Redes domésticas"

Privacy? Yes, please

--Originally published at Computer and Information Security

With all the attention that Facebook ir receiving, what are you doing to protect your information? Not just your Facebook’s personal info, but also your internet traffic is somewhere in a server, without even your consent. Facebook isn’t just the only one that retrieves your traffic information, also Google and many other companies, even with a VPN. Nowadays, it is difficult to hide your information from these companies, but there is always a solution, or at least to protect a little more your information.

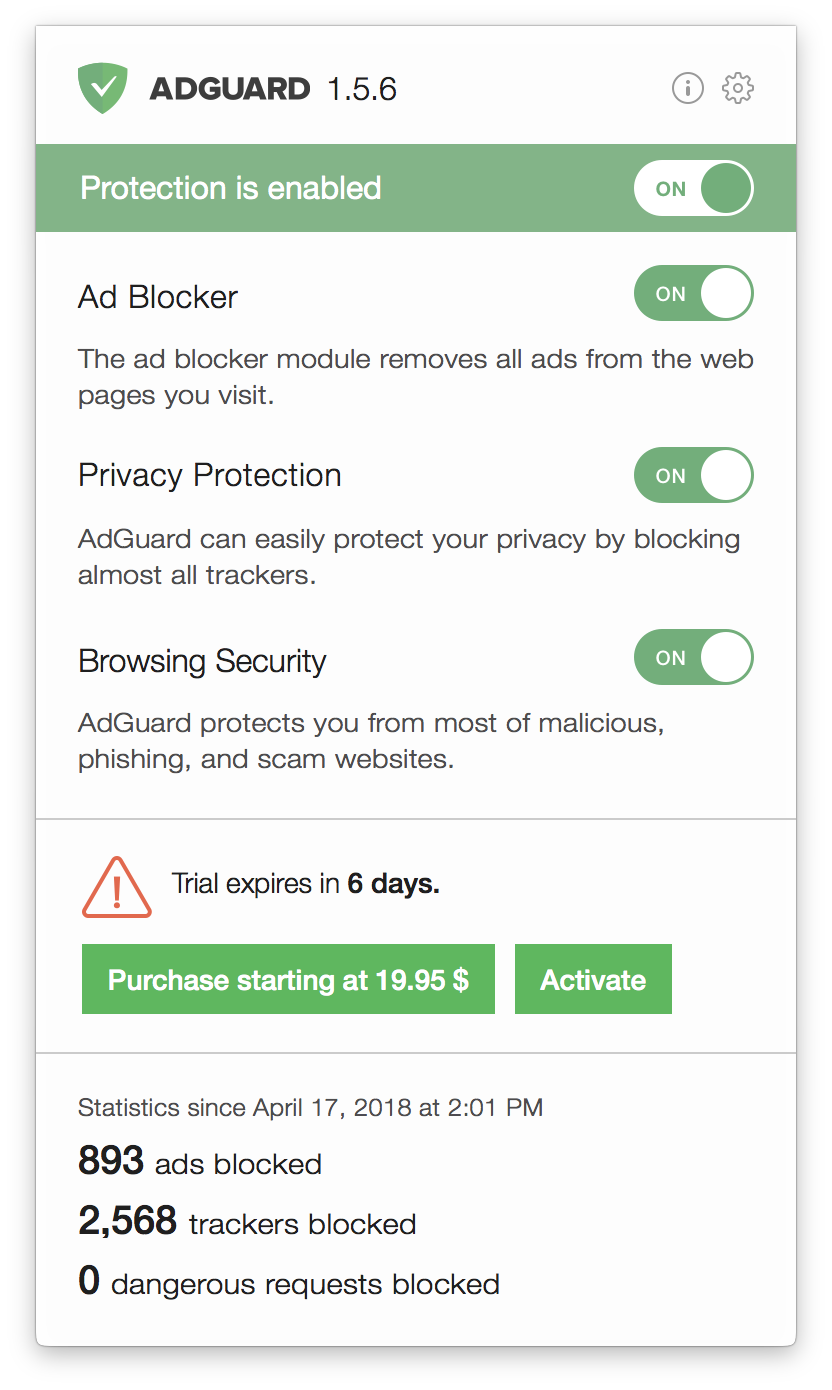
Personally, I do think that ads are necessary when the content is free because it’s work that it given for free. The problem is when the pages that are publishing those ads are also giving your personal info and internet traffic to a third-party company without even saying it to you and that’s the point that isn’t fair or correct. With all of the privacy movement, I just decide to look for an AdBlocker to my MacBook Pro. Not just to hide those invasive ads, but also to protect a little more my information. While making a little research through Reddit, I found a thread asking for some AdBlockers (link: https://www.reddit.com/r/apple/comments/7o7zw9/your_favorite_adblocker_for_safari_macos_with/). Thanks to the comments, I opted for AdGuard. My experience was incredible.

Adguard-Mac.png

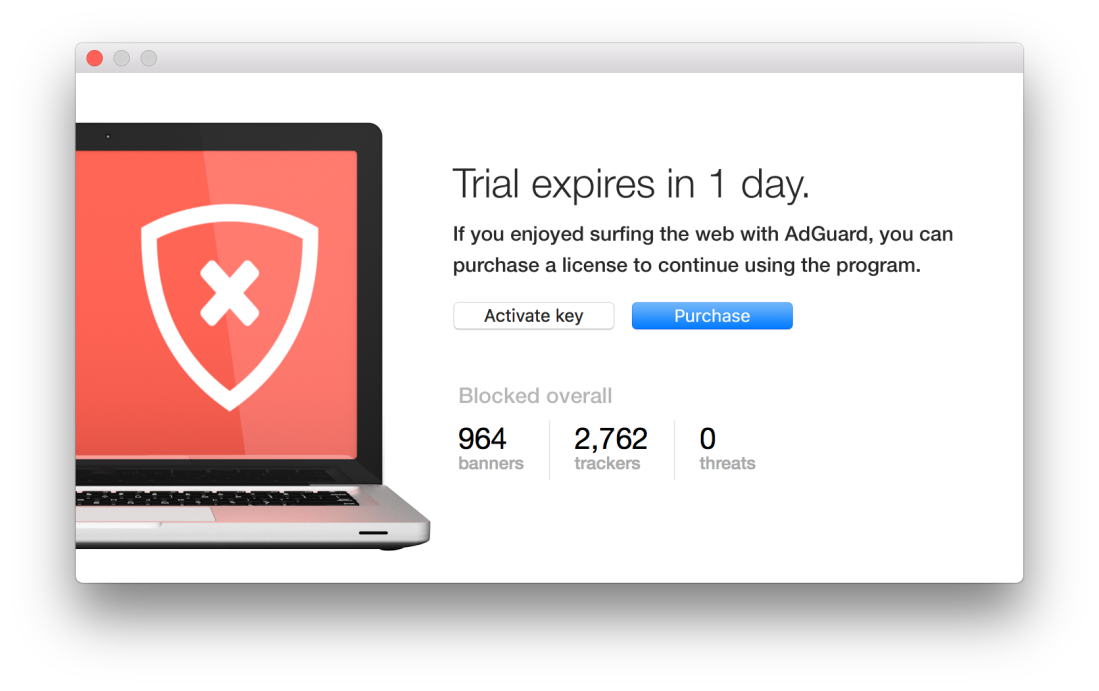
AdGuard isn’t my first ad blocker, but it was completely different from the others. Starting with its interface, it is really easy to use. It has interesting options, a menu appears when a page has ads and it gives you options for the page, such as: Block Element, Add Exception, or do not block the page for 30 seconds. For experience, some ad blockers doesn’t work with some pages becase devs are implementing a way to find out when you have an ad blocker, but the cases with AdGuard were

Screen Shot 2018-04-30 at 11.08.12 AM.png
Screen Shot 2018-04-30 at 12.04.19 PM.png
Screen Shot 2018-04-30 at 11.17.13 AM.png
Continue reading "Privacy? Yes, please"

The end

--Originally published at Let’s talk security. – Rudy's Corner

The semester is done, my 8th semester studying ISC came to an end and I don’t know how to feel about it, but that is not what this post will be about. I will talk about what I learned throughout the Security course. This won’t be a huge blog post, I’ll just point out a few things that I am taking from this course.

  • Update, the importance of keeping all my devices updated so that I have the latest security.
  • Backup, keep a lot of different backups in case something fails with the computer you won’t lose the data.
  • Layers, it is of great importance to have as many layers of security as possible, so it becomes harder and harder to break into your system.
  • Trust no one (or almost no one), check who your giving permission to see your social media, who sees what and why they see it.
  • Stay up to date, keep checking the new things that come up, the new technologies, the new threats.

And those are the things that I learned more from this course, thanks for reading it has been a great ride!

Bye.

Packet Squirrel

--Originally published at Lord Security

On these days I could get my hands on a really cool device from hak5, the Packet Squirrel, which can be used for an Ethernet man-in-the-middle attack, being able to use it as a sniffer or to get remote access to a network.

Capture.PNG

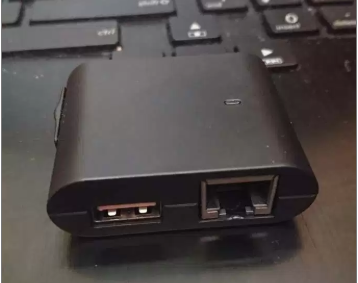
This tiny device has a button to turn it in, an Ethernet in port, an Ethernet out port, a microusb por for power, a usb port for storage and a switch to select which of the payloads to run.

31948633_10156605872783311_5151475695712468992_n.jpg

squirrel

The default payloads the packet squirrel has are:

  • TCP Dump: . It allows the user to display TCP/IP and other packets being transmitted or received over a network
  • DNS Spoof: Alters the DNS directions from the victim to show a different page
  • OpenVPN: Provide remote acces to the network or client tuneling

To use de TCP dump you just need to select the first payload, moving the swithc until the left and connect it to the device you want to see the traffic. Then the led will start to flash yellow indicating it is saving the traffic in the usb flash until you push the button to indicate you are done. Finally plug the usb to you PC to see a pcap file, which you can inspect the traffic with a protocol analyzer, like Wireshark.

dumptrafico

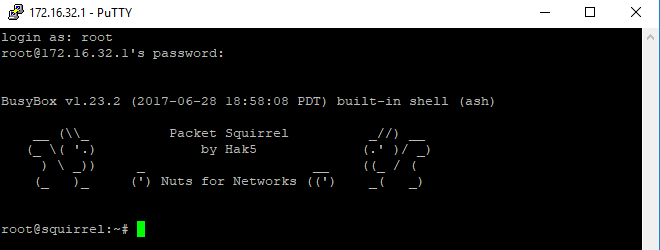
In the case of the DNS spoof you need to enter the arming mode of the packet squirrel (rightmost side), and configure the spoofhost file with the domain and the ip you want to set.

putty

With the OpenVPN you can provide remote access to the network, the target device will have access to the network in the Ethernet out port without interruption, the OpenVPN will be established enabling remote acces to the pcket squirrel

Also it can be used to tunnel the traffic

sjfad
Continue reading "Packet Squirrel"

Configurando el WiFi Pineapple

--Originally published at Toledo

En éste blog hablaré de cómo configurar y empezar a utilizar el Pineapple. Para éste caso, estaré utilizando la versión Tetra del dispositivo. Y para configurarlo desde cero, estaré utilizando mi celular con Android.

Hack5 tiene documentado en su página los pasos a seguir para configurar el Pineapple. Las instrucciones en éste blog están basadas en dichos videos. Pueden revisar el video en inglés aquí.

Viene con un pequeño manual, con el dispositivo. Éste contiene contenido en inglés de todas las capacidades que tiene el WiFi Pineapple, cubre conceptos básicos relacionado con WiFi y documentación de uso.book_wp

Lo primero para empezar a utilizar el Pineapple es conectarlo y esperar a que la luz acul se quede estable.

20180504_022701

Conectar las antenas es totalmente innecesario, al menos para hacer pruebas locales y jugar con el Pineapple. Pero debemos reconcer que se ve 10 veces más intimidante con ellas puestas.

20180504_022828

Después sigue instalar la applicación de Android para conectarnos al Pineapple utilizando nuestro celular. La applicación se llama WiFi Pineapple Conector. Es necesario que el celular soporte USB Thetering, ésto es una funcionalidad que le permite al celular compartir internet a través de USB.

Conectamos el Pineapple a nuestro celular, y abrimos la aplicación. Vamos a necesitar activar el USB thethering, una ves lo hemos hecho. La app nos va a preguntar si está activado. Simplemente decimos que sí.

El Pineapple de fabrica viene sin los firmwares necesario instalados. En dado caso, va a ser necesario descargarlos desde https://www.wifipineapple.com/downloads/tetra/latest e instalarlos manualmente.

Vamos a ver por primera vez la interface del Pineapple. Simplemente damos clic en Get Started. Nos va a pedir que desactivemos el WiFi desde el Pineapple. Un simple clic al botón que está en la parte trasera del Pineapple hace el truco. Es el único botón que tiene

Screen Shot 2018-05-04 at 2.46.09 AM
Screen Shot 2018-05-04 at 2.46.25 AM
Screen Shot 2018-05-04 at 3.07.25 AM
Screenshot_20180504-030811
Continue reading "Configurando el WiFi Pineapple"

¿Qué es el WiFi Pineapple?

--Originally published at Toledo

El WiFi Pineapple es un dispositivo desarrollado por Hack5, que actúa como un Access Point, o modem Le permite a quien lo controla monitorear, scannear  o interceptar la comunicación de quienes utilizan la red abierta que el dispositivo genera.

No con la intención de causar daño. La inspiración de su creación es para servir como herramienta de auditoría de seguridad para expertos en el área. Tiene en el mercado alrededor de 10 años, y al momento la empresa ha sacado seis generaciones.

El dispositivo tiene dos modelos principales:

WiFi Pineapple Tetra

tetra

Siendo éste el modelo con la version completa y con todo el poder de un WiFi Pineapple. Según la página web, cuenta con las siguientes especificaciones:

  • PineAP software, con interface web y modulos disponibles
  • (2x) Dual-Band (2.4/5 GHz) 802.11 a/b/g/n radios
  • (4x) Amplificadores Skybridge con 800 mW por radio
  • Puerto USB Ethernet (Realtek RTL8152B chipset)
  • Puerto USB Serial (FTDI D2XX chipset)
  • 533 MHz MIPS 74K Atheros AR9344 SoC
  • 2 GB NAND Flash
  • USB 2.0 Host Port
  • RJ45 Fast Ethernet LAN Port

WiFi Pineapple Nano

nano1_1bb4f835-cdc1-424b-9d4f-3a03863fde71_1024x1024

Es una versión compacta del WiFi Pineapple, su diseño está enfocado en la portabilidad para fácil acceso en cualquier ambiente donde se vaya a utilizar. Con el trade-off de que el poder que tiene disponible es ligeramente menor a la versón Tetra. De acuerdo a Hack5, sus caracteristicas son:

  • PineAP software, con interface web y modulos disponibles
  • 2 antenas 2.4 GHz b/g/n Atheros radios
  • 400 mW por radio
  • Puerto USB Ethernet Plug
  • Capacidad de memoria con Micro SD (hasta 128 GB)
  • EDC Tactical case y bateria opcionales
  • Puerto USB 2.0

Ambos modelos tienen capacidaded para auditoría de seguridad impresionantes. Elegir uno o el otro depende de las necesidades que se tenga en cuanto a portabilidad y poder requerido.

Clean your shoes before entering the house.

--Originally published at Merino is talking about security.

Data sanitization is a simple yet effective tool to preventing attacks. What kind of attacks? you may ask, well many, but all can be summarised as code injection.

In web applications you may encounter with a form, any form, that lets you write whatever string and maybe do something with it, display it as a comment, save it in the data base, send it as message, etc. But lets say that instead of jut plain text, I write a piece of code, and if the input isn't sanitized the page will run that code, and the results can be disastrous. Let the people at computerphile explain it better: 
there are quite some kinds of code injection but here as the most common ones:

SQL injection: As the name indicates, is meant to attack SQL databases, adding sql scripts to the un-sanitized input can result in the database running said queries and returning data that should be read by the user. More info.

Javascript and HTML injection: By adding Javascript and HTML code to un-sanitized inputs can cause the browser to run and make the page behave in unwanted ways, this can potentially affect other users ass well. More info.

A simple solution to this problem is input sanitization, it cleans your inputs so that malicious code can't be written into it. You can do this by preventing certain characters or sets of characters to be typed in your input. Maybe banning the single quote or the <> brackets. The people at eSecurity Planet wrote a very in depth article on how to protect your web applications using code sanitization, there are many things you can do. Since HTML5, input type can be added to any input tag, and that can be a small step into making sure that the incoming Continue reading "Clean your shoes before entering the house."

Microservices == Microhell

--Originally published at miguel.net

Microservices, a word that has been buzzing around a lot, every one is writting, speaking and developing under the microservices mindset, but it is never that simple, just splitting a service into small pieces and having them interacting over the wire can cause a great mess.

Not having a good planning on how the service will interact, can cause an auto DDoS, because all the services are too chattie and then overload the network, so essentially, you performed an DDoS attack just by trying to run your system, congratulations.

So, what to do?
Now that the naive solution (http) is discarted, how can you interact in a system where everything is logically separeted? Many solutions have evolved throught out the years, one of the best solutions, specially if you need one way communication, is using a queue service, where messages can be posted and they can be received from the other end of the queue to be proccessed.

RPCs (Remote Procedure Calls), this method of executing actions is sometimes slow, depending on the level of concistency been used, two-phase commit is very costly but is very effective.

During the 80's and 90's, a paper was show, called SAGAS, which described long running transaccions on databases, and how to utilize them to make long queries work efficently, now it had evolved into Distributed SAGAS, a pattern where each microservice is a task, and a sequence of tasks is transaccional, so when an update occurs, every service that needs to be updated will receive the info. Also I really like the idea of a "pipeline" for this kind of situations, for example, maybe a reservation site allows you to book a flight, pay your hotel and rent a car on the same website, at the same time, so then, based Continue reading "Microservices == Microhell"

Become the hackerman of your router

--Originally published at Paco&#039;s adventures

This post is for you to experiment with your router. Maybe you know, or don’t, but you can access your router and change stuff like the name of your network, the password and also the password to access the router. To enter the router you first need its IP address, which you can find in the properties of the network you are connected. After you enter that IP address in a web browser you will be in a log-in page and here is where the fun begins (It’s something like this):

Resultado de imagen para router login

If you check the manual of your router it will tell you that to access it you write something like “admin” or “root” as username and “password” or “admin” for the password, this is the default setting of the router, and you should/must not leave it like that, why? because if someone want to be a bad person, they can enter and modify the things I wrote at the beginning.

You can check the brand of your router in the internet and you will find a page that tells you the default username and password to access it, so it’s not difficult for someone (hacker) to find out and do bad things to your network.

But why am I telling you all of this? Well it’s because of a friend’s story: He went to a place where sell buffalo wings, he saw that the place had wi-fi and just for the heck of it he checked if their router was secure, and oh surprise, it wasn’t he could’ve done anything he wanted, but he is a really nice guy and told the owner the problem and even help him fixed it. Now, almost every place I go (restaurants, bars, shops, etc.) I try to enter their router so Continue reading "Become the hackerman of your router"

Threats for online gamers

--Originally published at Information Security A01229898

Hi everyone, While I was searching about video games I found about this threats that could happen for gamers, I took this information from a post of we live security esset, so let’s start this.

The first popular threat is TeslaCrypt:

it was designed to encrypt game-play data for dozens of video games, prompting the user to pay a ransom to decrypt those files. Targeting some well-known games including Call of Duty and Minecraft, Teslacrypt blocks access to saved game files, configuration files or game items.


Second one is Password Stealers:

Just as there are types of spyware called keyloggers, which capture keyboard events and try to steal access credentials, there are also pieces of malicious code that attempt to steal access credentials for online games or platforms, such as Steam or Origin. This type of malware is heavily based on social engineering or deceit in order to infect its victims. One of the most popular scams is when a player – the victim – receives a chat message from another player offering him to join his team. This unknown player is usually very friendly and praises the victim for his gaming skills, telling him that he should join this team of great players.

At some point, the victim is prompted to download and install an application – for example, a voice communication program. The attacker will be very insistent on the fact that the victim cannot become part of the team if he does not have that application. And of course, the downloaded executable is not really a chat client, but a malicious software capable of stealing account credentials.

The third one is Fake Game Cracks

This is another social engineering technique, regardless of the kind of threat installed in the end. The deceit in this case has to do Continue reading "Threats for online gamers"