
JUnit is an unit testing framework for the Java programming language.
From tutorialspints:
JUnit promotes the idea of “first testing then coding”, which emphasizes on setting up the test data for a piece of code that can be tested first and then implemented
This approach is kind of test a little and code a little because you don’t test the whole project but instead part of the software such as individual method to ensure that is working properly. It also increase the productivity of the programmer and reduces the stress; this because you do not leave any problems or things like “fix it later” in the program.
In java, JUnit is used as a library by importing the necessary classes an then creating a constructor of the test and implementing methods that call an instance of the class you want to test that are used to execute specific method of the tested class. The goal for each of those testing methods is to assert the expect behavior comparing the the expected value and the actual value. You can use any data type: from data primitive (such as int, char, float, etc.) to arrays of any type, any objects and nulls.
Many advantages of JUnit are that it doesn’t require human judgment to interpret where the failure happens, what you actually have to do is create a testing class from your class that you want to test, make some adjustments and execute it and wait until the output tells you where the error is. And if your are using an Integrated Development Environment (IDE) is more easier to do it, which is actually another advantage because JUnits is included in most of IDE such as Eclipse and NetBeans.
I will write a quick guide of how to use it
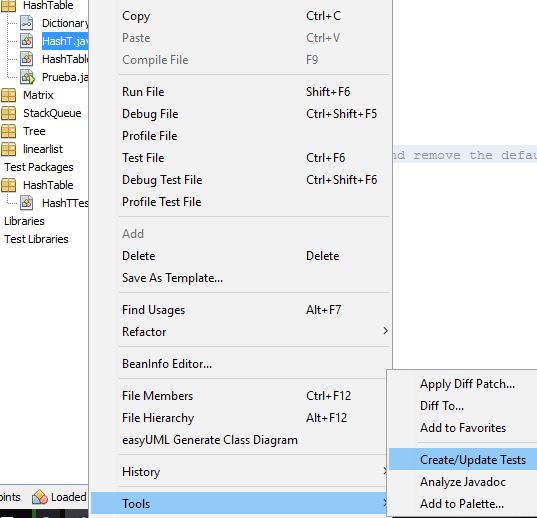

First right click on your class that you want to test and select:
Tools > Create/Update Tests
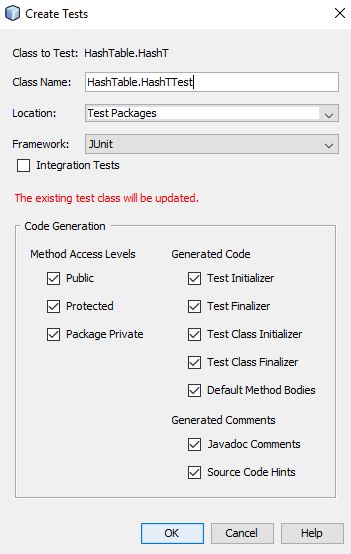
Then you can select any option from there, if you are not experienced I recommend to leave it in the default configuration and only click the “Ok” button. After that it will appear a small window asking you which version you want to use, just select the latest one.
Finally, a new class named “YourClass”Test will be generated with the default specification for testing the method of your class.
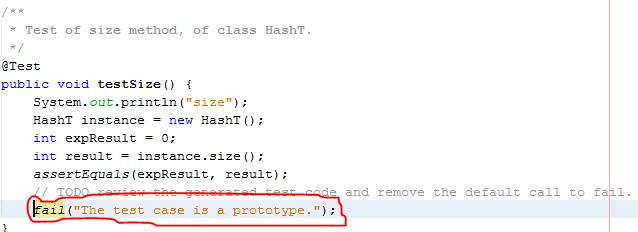
That is an example of a test Class of my HashTable class and the method above is testing the method getSize of my HashTable. The first thing you have to do is delete or comment that method named “fail” that is being called at the end; this is because it will make the output to say that your method failed whenever your result were correct or not.
As you can see there is a expResult and result variables; what you have to do is to change the default value of the expResult to one value that you know that is correct ff the method is called. Depending of the method you are testing, you will also have to change a variable that represent the input of the method.After all this what you have to do is to run the class.
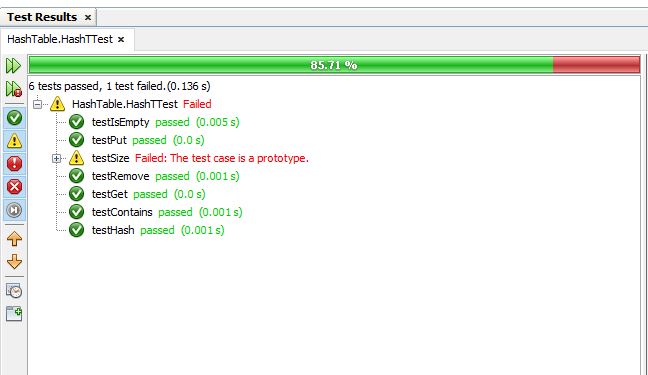
Here is an example of the output after running it:
A you can see, my getSize method failed because I didn’t delete the fail method at the end.
You can also run more that one test at the same time by right-clicking a package instead of a single class (while doing the same steps) and it will create a Test Suite class.