
Quiz 6
I think I get it now:

WSQ08 wasn’t really that hard. I used the book for the understanding of functions and to see some examples and understand more visually, I used this webpage:
http://www.cplusplus.com/doc/tutorial/functions/
You can check my code here if you want:
On these masteries I’m going to show you what are IF and ELSE statements in C++ and how to use them.
If and else are used in C++ when you want something to happen inside your code ONLY when a condition is given.
On a flow chart, IF and ELSE look like this:
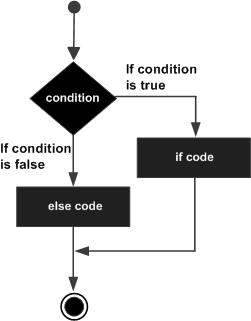
For example, in real life, your mom may tell you: “You are ONLY going to the party IF you score more or equal than 85 on your TC1017 exam. Else, you are not going to the party.”
For the purpose of this mastery, let’s creat that exact program. We will need an IF and ELSE statement, and some cin and cout commands we learned on mastery 10.
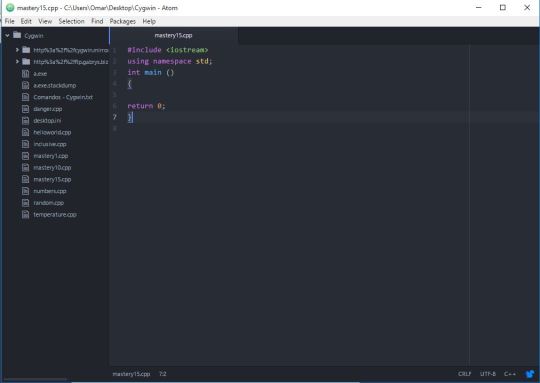
Let’s go ahead and create our “basic program” again.
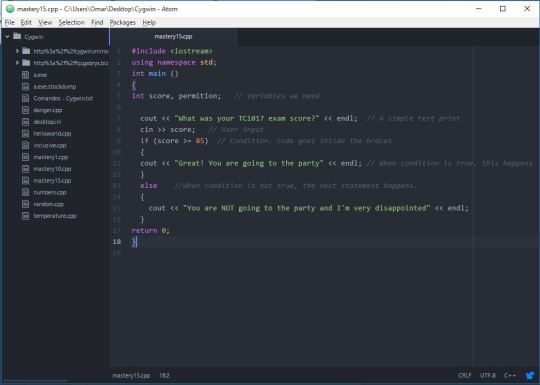
Now, let’s grab our real life example. Let’s give the program the same condition your mom gave to you. Do as follows:
the program will print a message where it says that
you are not going to the party.
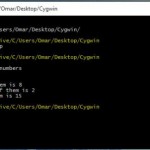
Now let’s test our program. Remeber to change directory, compile and then run.
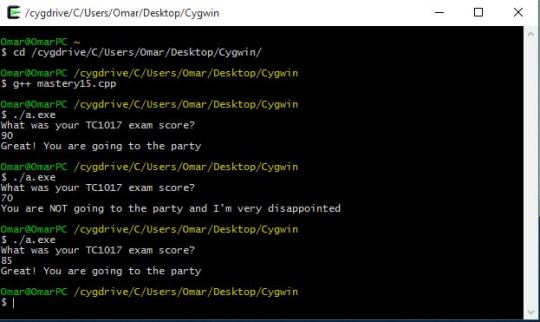
I tested every possible condition the user could input. Remember that if your program stopped, you can simply run (./a.exe) again and the program will work. You don’t need to close the terminal and open it again.
That’s the basic use of IF…ELSE and now you know how to use it, congrats! 😀

Today, I’m going to show you some basic input and output in C++.
On masteries 1 & 7 we learned some basic output, which is used as “cout”. cout is used when the program prints information you gave it to it in the program. When you want to input information from the terminal, while the program is running, you need a variable and the “cin” command.
In order to do this, we will create a program that asks the user for two integer numbers, and then the program will add those numbers and then print the result.
So, you will need our “basic code” that we learned on masteries 1 & 7:
Now that we have our basic code, we will write the program inside the braces.
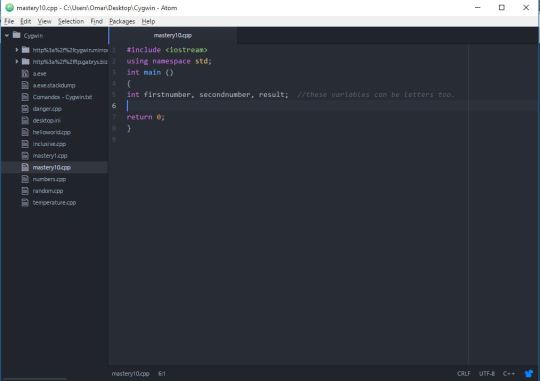
The first thing we need to do, is to establish the variables we are going to use. We need two variables for the numbers the user is going to input in the program and another variable that will work as the result.
The variables need to be established inside the braces, and are written as:
int FIRSTVARIABLE, SECOND, THIRD;
Now that we have our variables, we can tell the program what it needs to do. For that, we will simply do as follows:
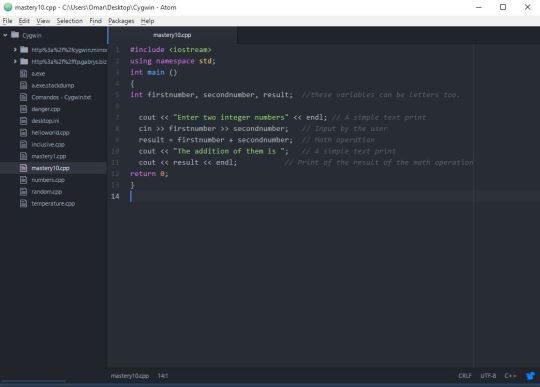
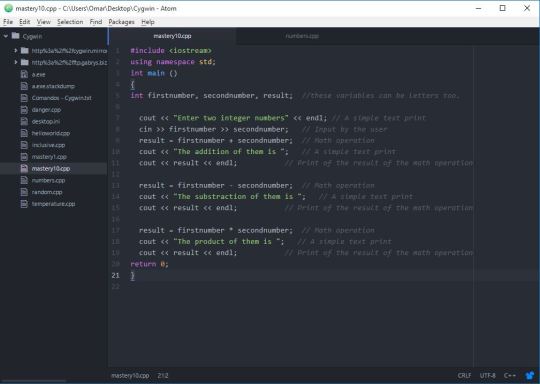
And that’s it. You can use this principle to perform other math operations:
Now, run your program in the terminal. Remember to change the directory, compile your program and then run it:
You now know how to do a basic program with inputs and outputs, congrats! 😀
On these two masteries, I’m going to show you how to create a Blog, Twitter, and a Github account; and how to submit homeworks for TC1017 using your blog and Github.
So first, there are lots of options where you can create a blog. There’s WordPress, Blogspot, Weebly, Tumblr, and many, many more. In this case, I’m going to show you how to create a Tumblr blog because that’s the one I like the most, and because I think its UI is really friendly and nice.
The first thing you need is an email address. Once you have your email address, go to https://www.tumblr.com/ and register as a new user:
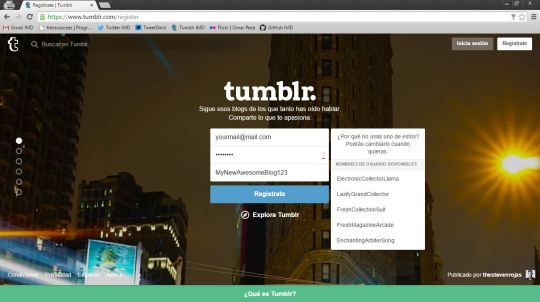
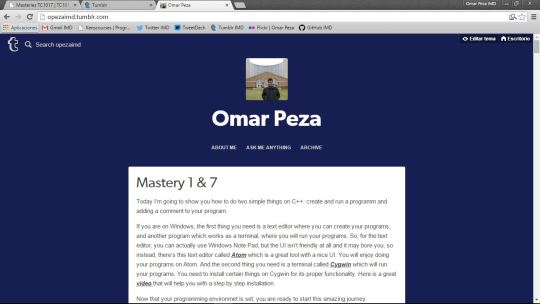
Once you are done with your registration, follow Tumblr’s step by step guide on how to get started with your blog and you’ll be done. Here is my blog’s home:
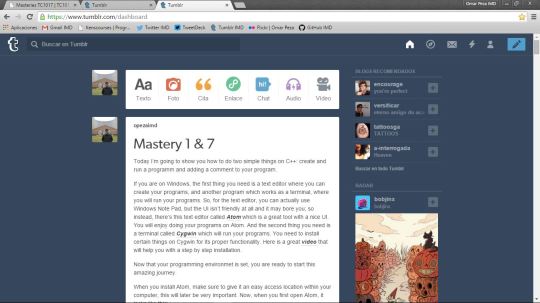
From there you can create different kind of posts or a combination of them. What you saw on the picture above is called dashboard. That’s how you see your blog. This is how others will see your blog:
You can explore my blog here.
We are done with your blog! Now, lets go ahead and creat a Twitter account.
Twitter is a pretty cool social network where interactions occur in real time. You follow people and you will see what they tweet. If people follow you, they will see what you tweet. Start conversations with your followers or with the people you follow! But what I like the most about twitter, is that you have to tweet in under 140 characters.
So, to create a Twitter account, go to https://twitter.com/ and register as a new user:

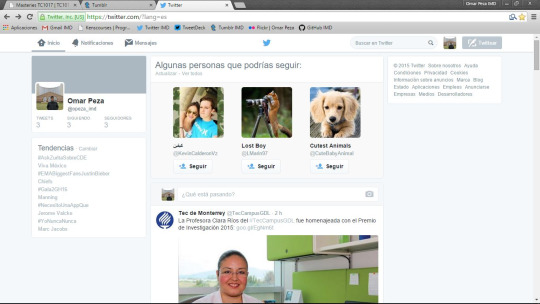
Once you are done with your registration, follow Twitter’s step by step guide on how to get started with your Twitter account and you’ll be done. Here is my Twitter home:

This is your Home. Tweets from people you follow will appear here. On the right top corner you can begin to tweet and start conversations with people you care about. You can check out my twitter account here.
And finally, lets go ahead and create a Github account. Github is a social network for programmers. Here you can paste your codes and compare your code with more people. It is also a great way to share your code.
So, go ahead and go to https://github.com/ and register as a new user:
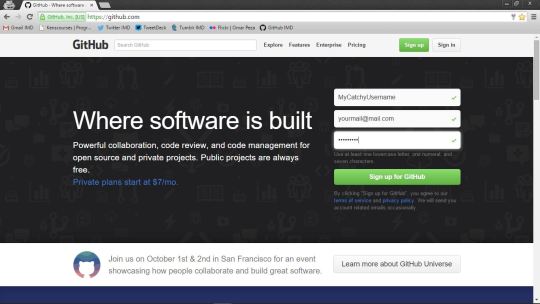
Once you are done with your registration, follow Github’s step by step guide on how to get started with your account and you’ll be done. Here is my Github home:

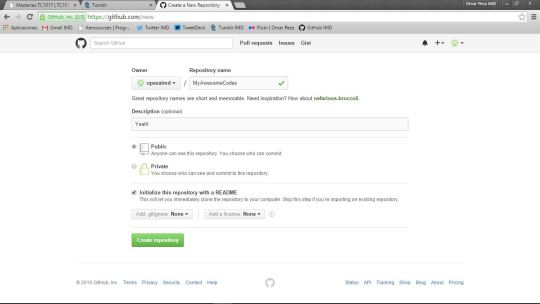
To begin sharing your codes, you need to create a “repository” which is like a folder where you will add your files. So go ahead and creat a New Repository. You can give it a name and a description, but the most important part is to check the option that says “Initialize this repository with a README” this will make your life easier, trust me.
Once you are done with your repository, you can create new files. Go ahead and add a file, here you can paste the first program you did!
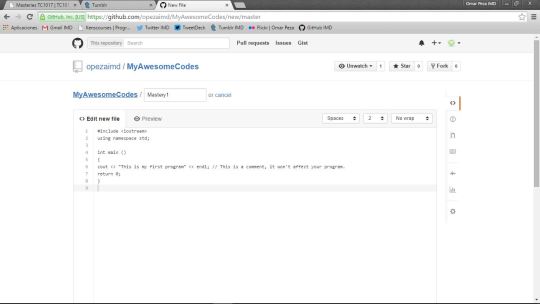
Now just save your file and you are done. Here is an example of what it looks like when you share your code.
You are now done with your new social networks!
Now, TC1017 requires that you submit your work via your blog and sometimes via Github, so go ahead and create a blog post (like this one) where you can name the WSQ you are working on and add the link to your code on Github. Here is an example of my WSQs:
http://opezaimd.tumblr.com/post/129289937990/007-this-wsq-was-the-hardest-one-i-have-done-yet
Congrats! 😀
Today I’m going to show you how to do two simple things on C++: create and run a programm and adding a comment to your program.
If you are on Windows, the first thing you need is a text editor where you can create your programs, and another program which works as a terminal, where you will run your programs. So, for the text editor, you can actually use Windows Note Pad, but the UI isn’t friendly at all and it may bore you; so instead, there’s this text editor called Atom which is a great tool with a nice UI. You will enjoy doing your programs on Atom. And the second thing you need is a terminal called Cygwin which will run your programs. You need to install certain things on Cygwin for its proper functionality. Here is a great video that will help you with a step by step installation.
Now that your programming environmet is set, you are ready to start this amazing journey.
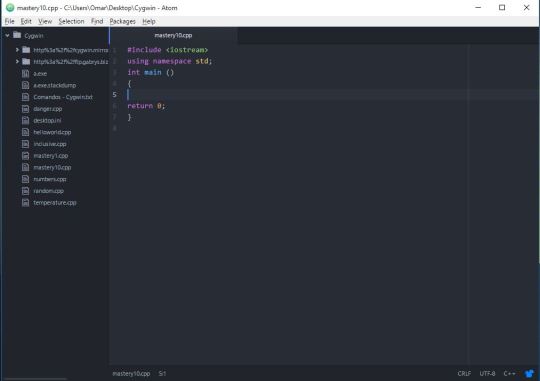
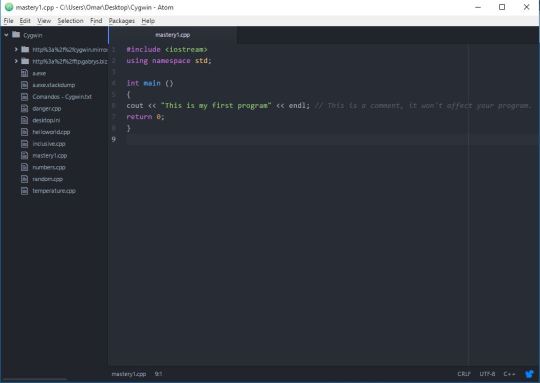
When you install Atom, make sure to give it an easy access location within your computer, this will later be very important. Now, when you first open Atom, it looks like this:
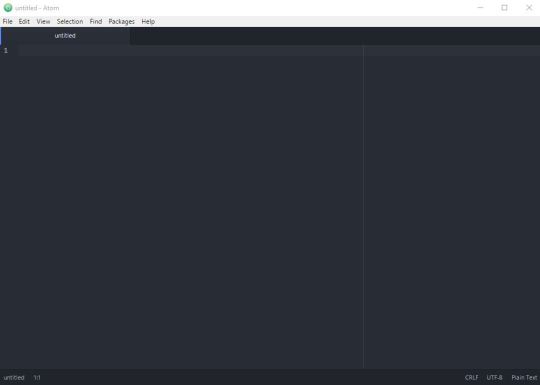
This is where the magic starts.
For your first program, you will be able to print (show in the terminal [Cygwin]) a message.
In C++ and for basic programs, you will have to write this first code:
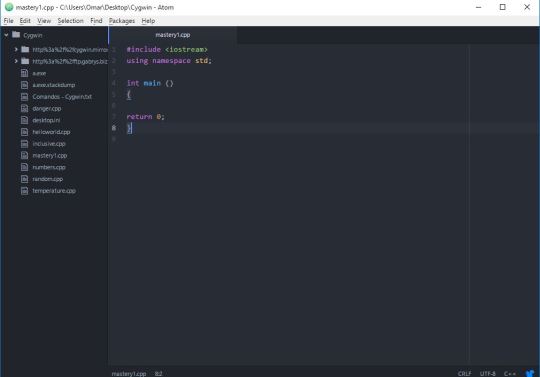
This gives you the ability to write your program INSIDE the braces { }. Once you have this piece of code, you will want to save it as “NAMEOFYOURPROGRAM.cpp”. The “.cpp” is the most important thing, because it gives the text the characteristic of being a C++ file.
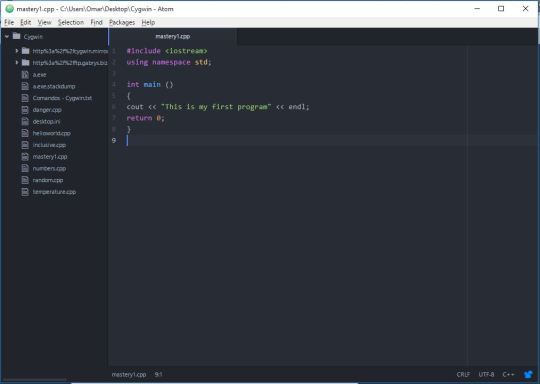
Now that you are done with this, you want to write the message you want the terminal to show when you run your program. So, in order to do it, you need your first command:
– cout (its C++ way of saying “show this”).
The programm needs to be written in this way:
cout << “The text you want to show” << endl;
Now you know how to write your very first basic C++ program!
There’s this other thing called comments that you can add to your program but it won’t affect it. They are useful when you want to explain how you did something in that specific line.
To add a comment, you simply write // and your comment next to it.
You are now done with your program!
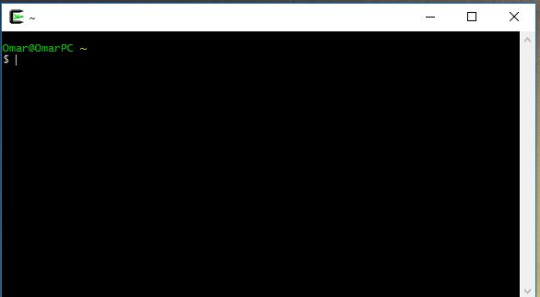
What you want next is to run your program. This will be done on the terminal, Cygwin.
When you open Cygwin, it kinda looks like any “hacking program” you’ve seen on a movie, which is pretty cool.
Now, you need to give the terminal the location of your program (that’s why I told you this step was important) and this is done with a command called “change directory” and is written as it follows:
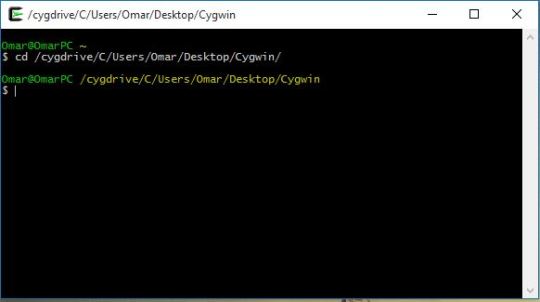
This change of directory is specific for my computer, it will look different with your computer and will depend on where you saved your first program.
Now that Cygwin knows where is the program you want to run, you need to tell it to compile it. This is done with the command: “g++ YOURPROGRAM.cpp”
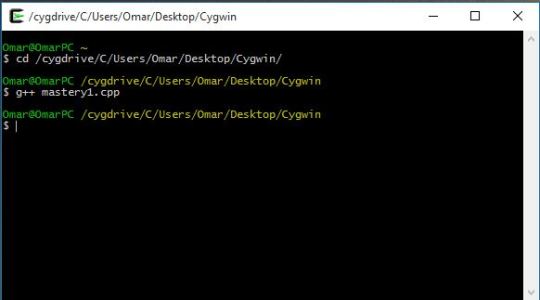
This will compile your program. Now Cygwin is able to run your program, and is done with the command “./a.exe”. When you execute your program, Cygwin will do whatever you programmed on Atom. In this case, just some text.
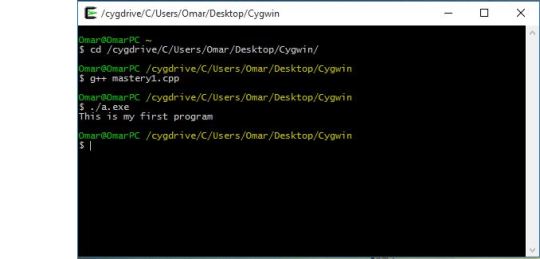
And that’s pretty much it! You are now able to create a C++ file, run your program, and add comments to it. Congrats! 😀

This WSQ was the hardest one I have done yet. The user had to enter two variables so the program did an inclusive addition of the two assigned values. For example: “2″ and “9″. What the program did was a sum of 2+3+4+5+6+7+8+9= 44.
I had a close result to the expected program but I missed some little details, so Ken helped me out a bit.
You can check my code here if you want:

Random number generator was a harder task. I tried to make it on my own, according to what my logic made me do, but I just couldn’t make it.
So first, I checked this website, which pretty much explained how to do it:
http://www.dreamincode.net/forums/topic/14057-producing-random-numbers/
And then I just fixed some little details to make it work as it was required.
Then, I tried to make the “attempts’ counter”, which I almost made it work by my own. This website helped me realize my mistakes and I was able to correct them:
http://www.cplusplus.com/forum/beginner/15560/
And that was it, I used “do…while” function and some if’s for the loops. You can check my code if you want here:
Sixth SenseThis was an easy task, I used my last program to develop this one, and it worked nicely.I used If functions and normal variables.If you want, you can see my code here:https://github.com/opezaimd/TC101/blob/master/WSQ05
✔
✔
✔
✔