
--Originally published at TC2027 – Surviving CS
SSH keys are another type of security that you can use in order to authenticate yourself in a server. They are plane easier because you don’t have to remember a complex password.
Using a public key over a password provides some benefits:
- Cryptographic strength that an overly complicated password can’t match.
- Automate the process for sign-on.
- No interactive login.
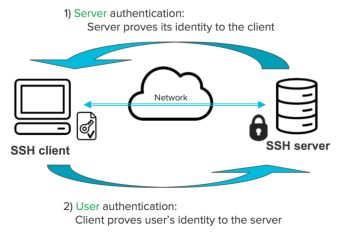
- They check your identity via a private key.
The crypto keys use a private-public key schema, this way if someone is trying to perform a man in the middle attack it won’t work because the keys can’t be intercepted.
SSH keys works the following way:
- In order to access a server you need a key to access this information.
- Only those who can access the information can have an authorized key that will grant access to the server.
- The user who has permission to access the server will use his/her private key to unlock the server.
- Each authorized key has a corresponding private key that can unlock the server.
Setting up an SSH keys
For this exercise I will be using Cloud9, Github and Heroku. The keys we are going to create will authenticate us and permit our virtual cloud9 computer to communicate with the Github servers. Then we will add those keys to Heroku in order to authenticate us when we perform a deploy to the server.
To create a key you need to type the following command in your working directory, this will create our key.
cat ~/.ssh/id_rsa.pub
After the key is generate, copy that content to your clipboard and add it in the github settings.

When this is done you can add those keys to Heroku
heroku keys:add
You will get a similar output

